Getting started
Add a Scanner
TruffleHog Enterprise includes managed Scanners that we host (the Hosted scanner), but you can also add your own self-hosted Scanners. If you only wish to use the managed Scanners, you can skip to the next section.
A Scanner only scans sources that are assigned to it. You may wish to use them for different accounts, networks, or regions.
Navigate to Settings -> Scanners and click on the plus button
Give the scanner a name
Download the Scanner config
Download the Scanner config and keep it in a safe place because it contains the credentials used to access TruffleHog and your data! For security and convenience, we recommend storing it in a secrets manager and using the built-in schemas for loading it.
Download the Scanner
Download the appropriate Scanner for your operating system and architecture. It will automatically run the latest version from your instance, don’t worry about updating it! Alternatively, run the Docker image we publish with:
docker run --net=host -v $(pwd)/config.yaml:/tmp/config.yaml -it --rm us-docker.pkg.dev/thog-artifacts/public/scanner:latest scan --config=/tmp/config.yaml
Configuring the Scanners
The Scanners support sources and notifiers configured in the web app, but also supports local configuration. Credentials provided via local configuration never leave your servers and can also be used to scan on-premise data.
By default, the downloaded Scanner config will scan all sources that were added to that scanner in the web app.
Add sources to scan in the local config If you wish to use the local configuration, see the additional documentation:
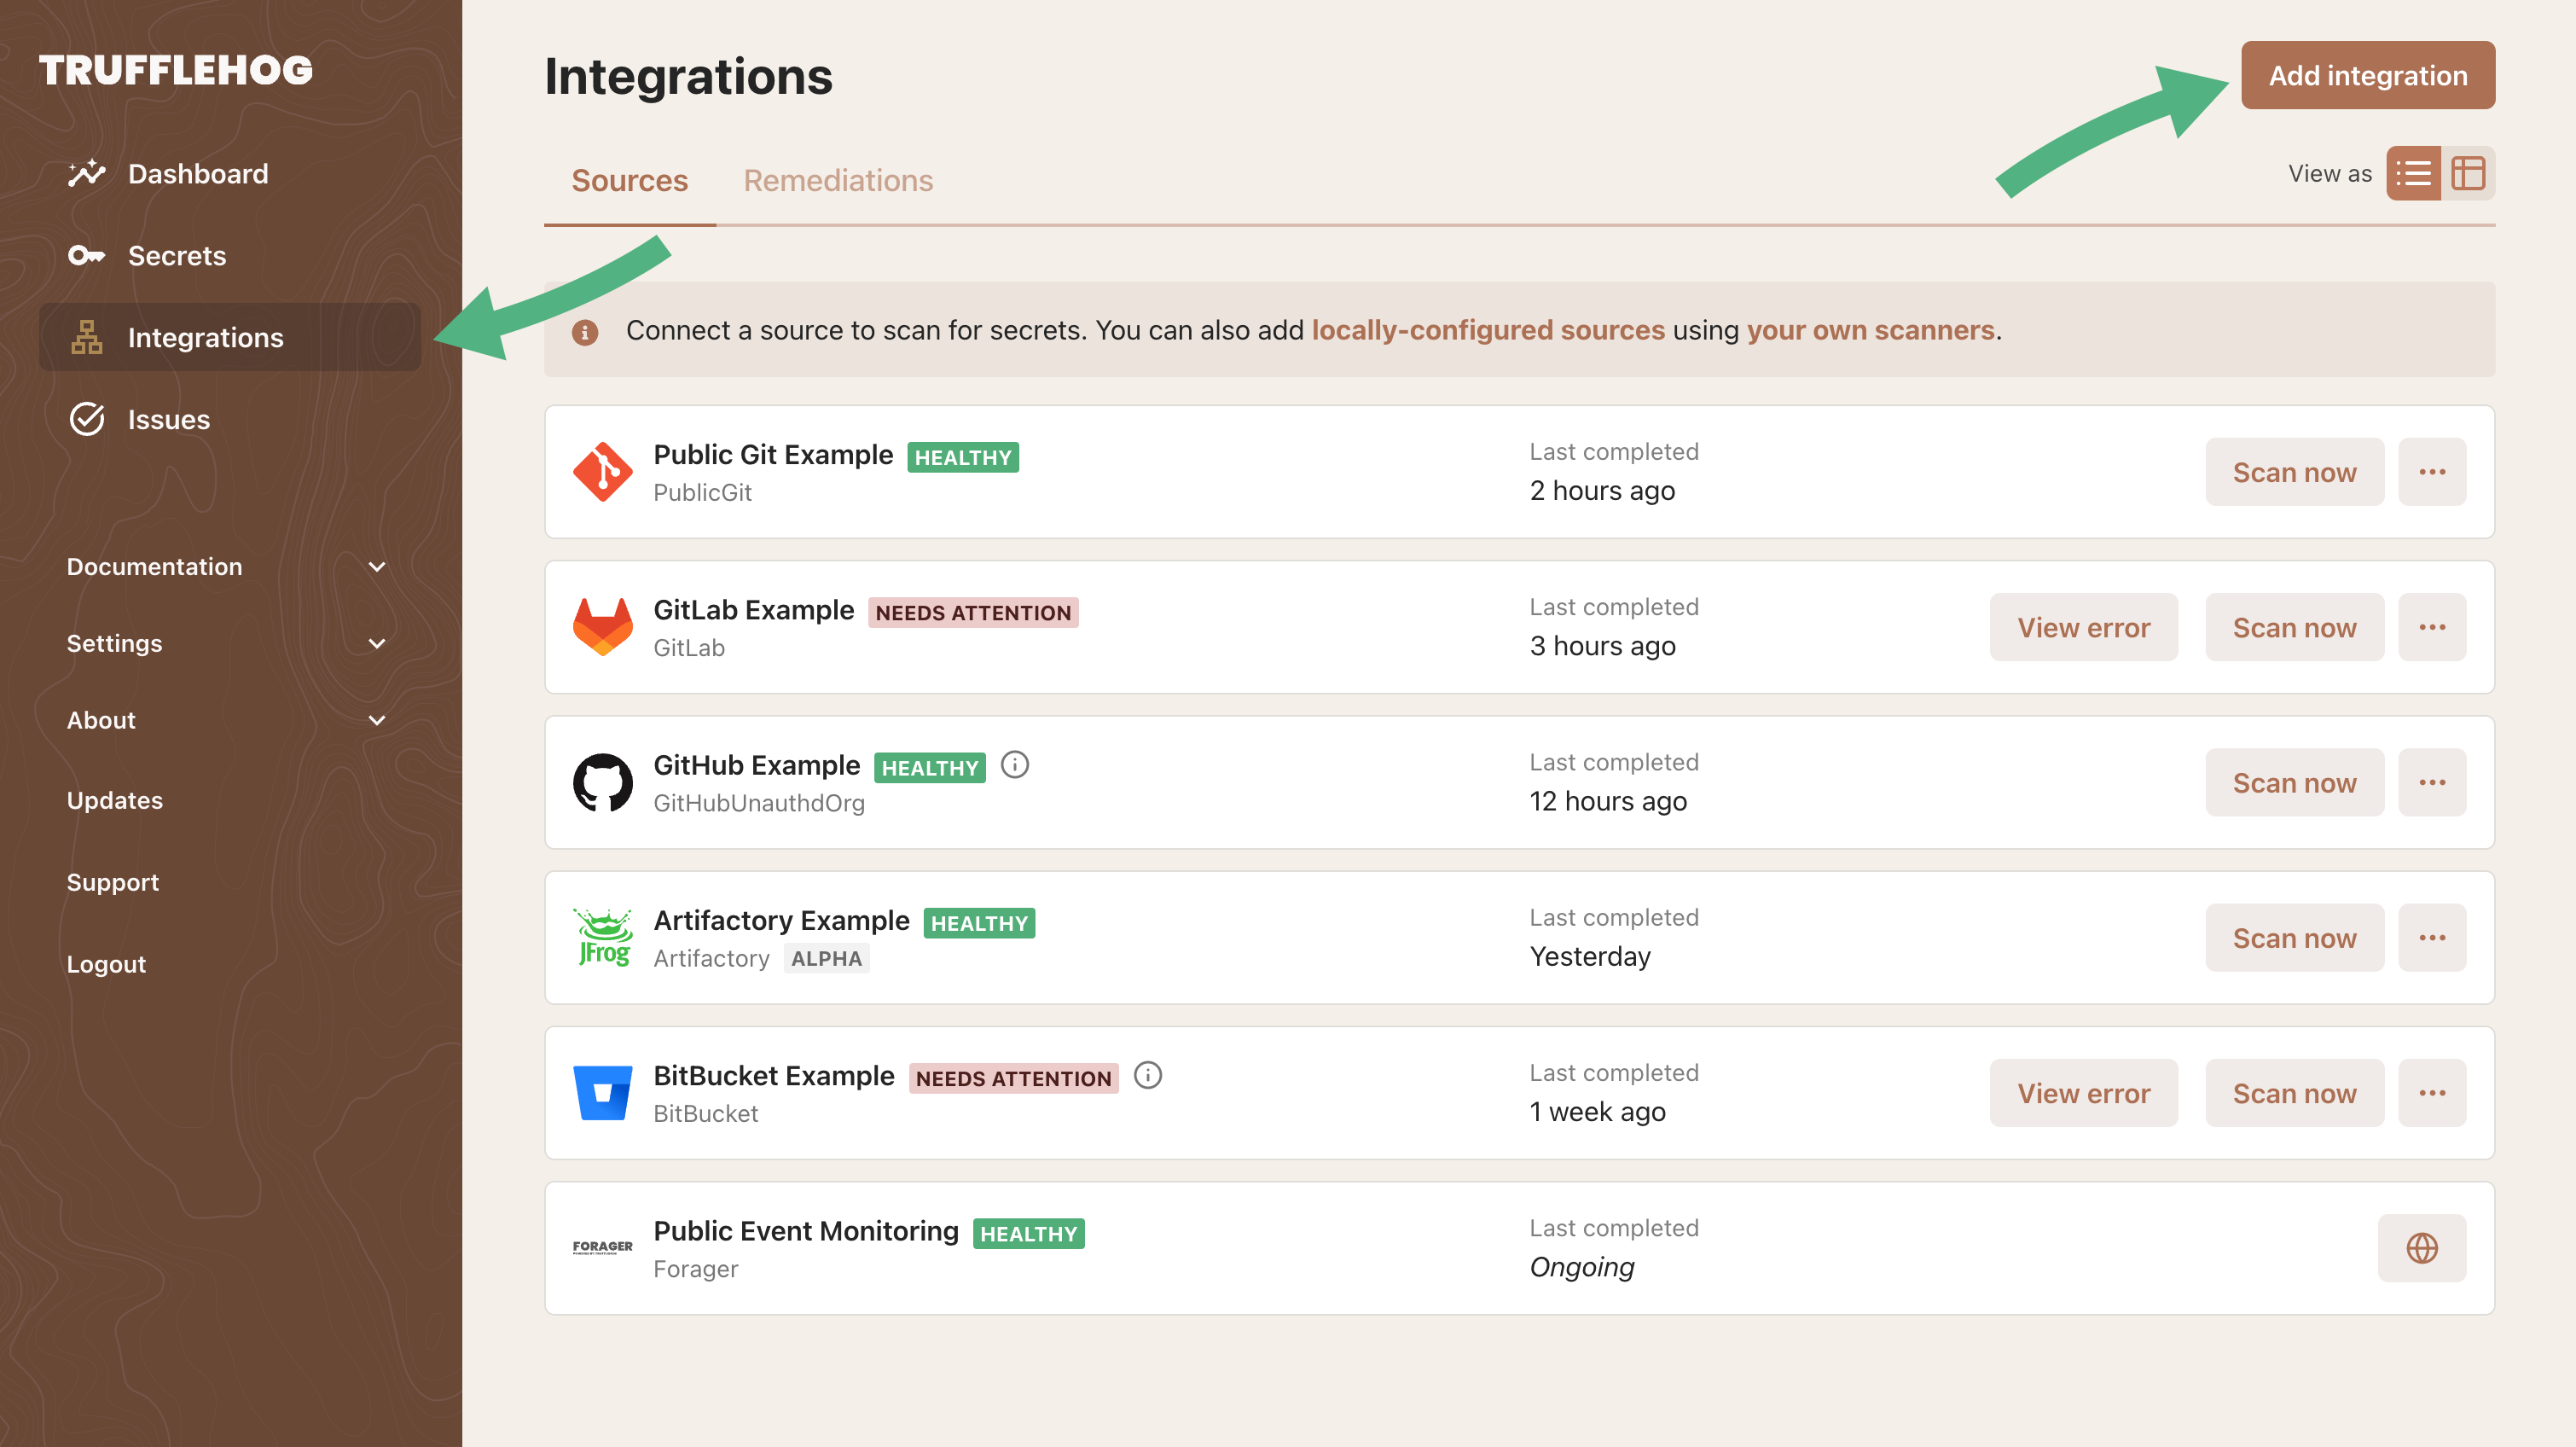
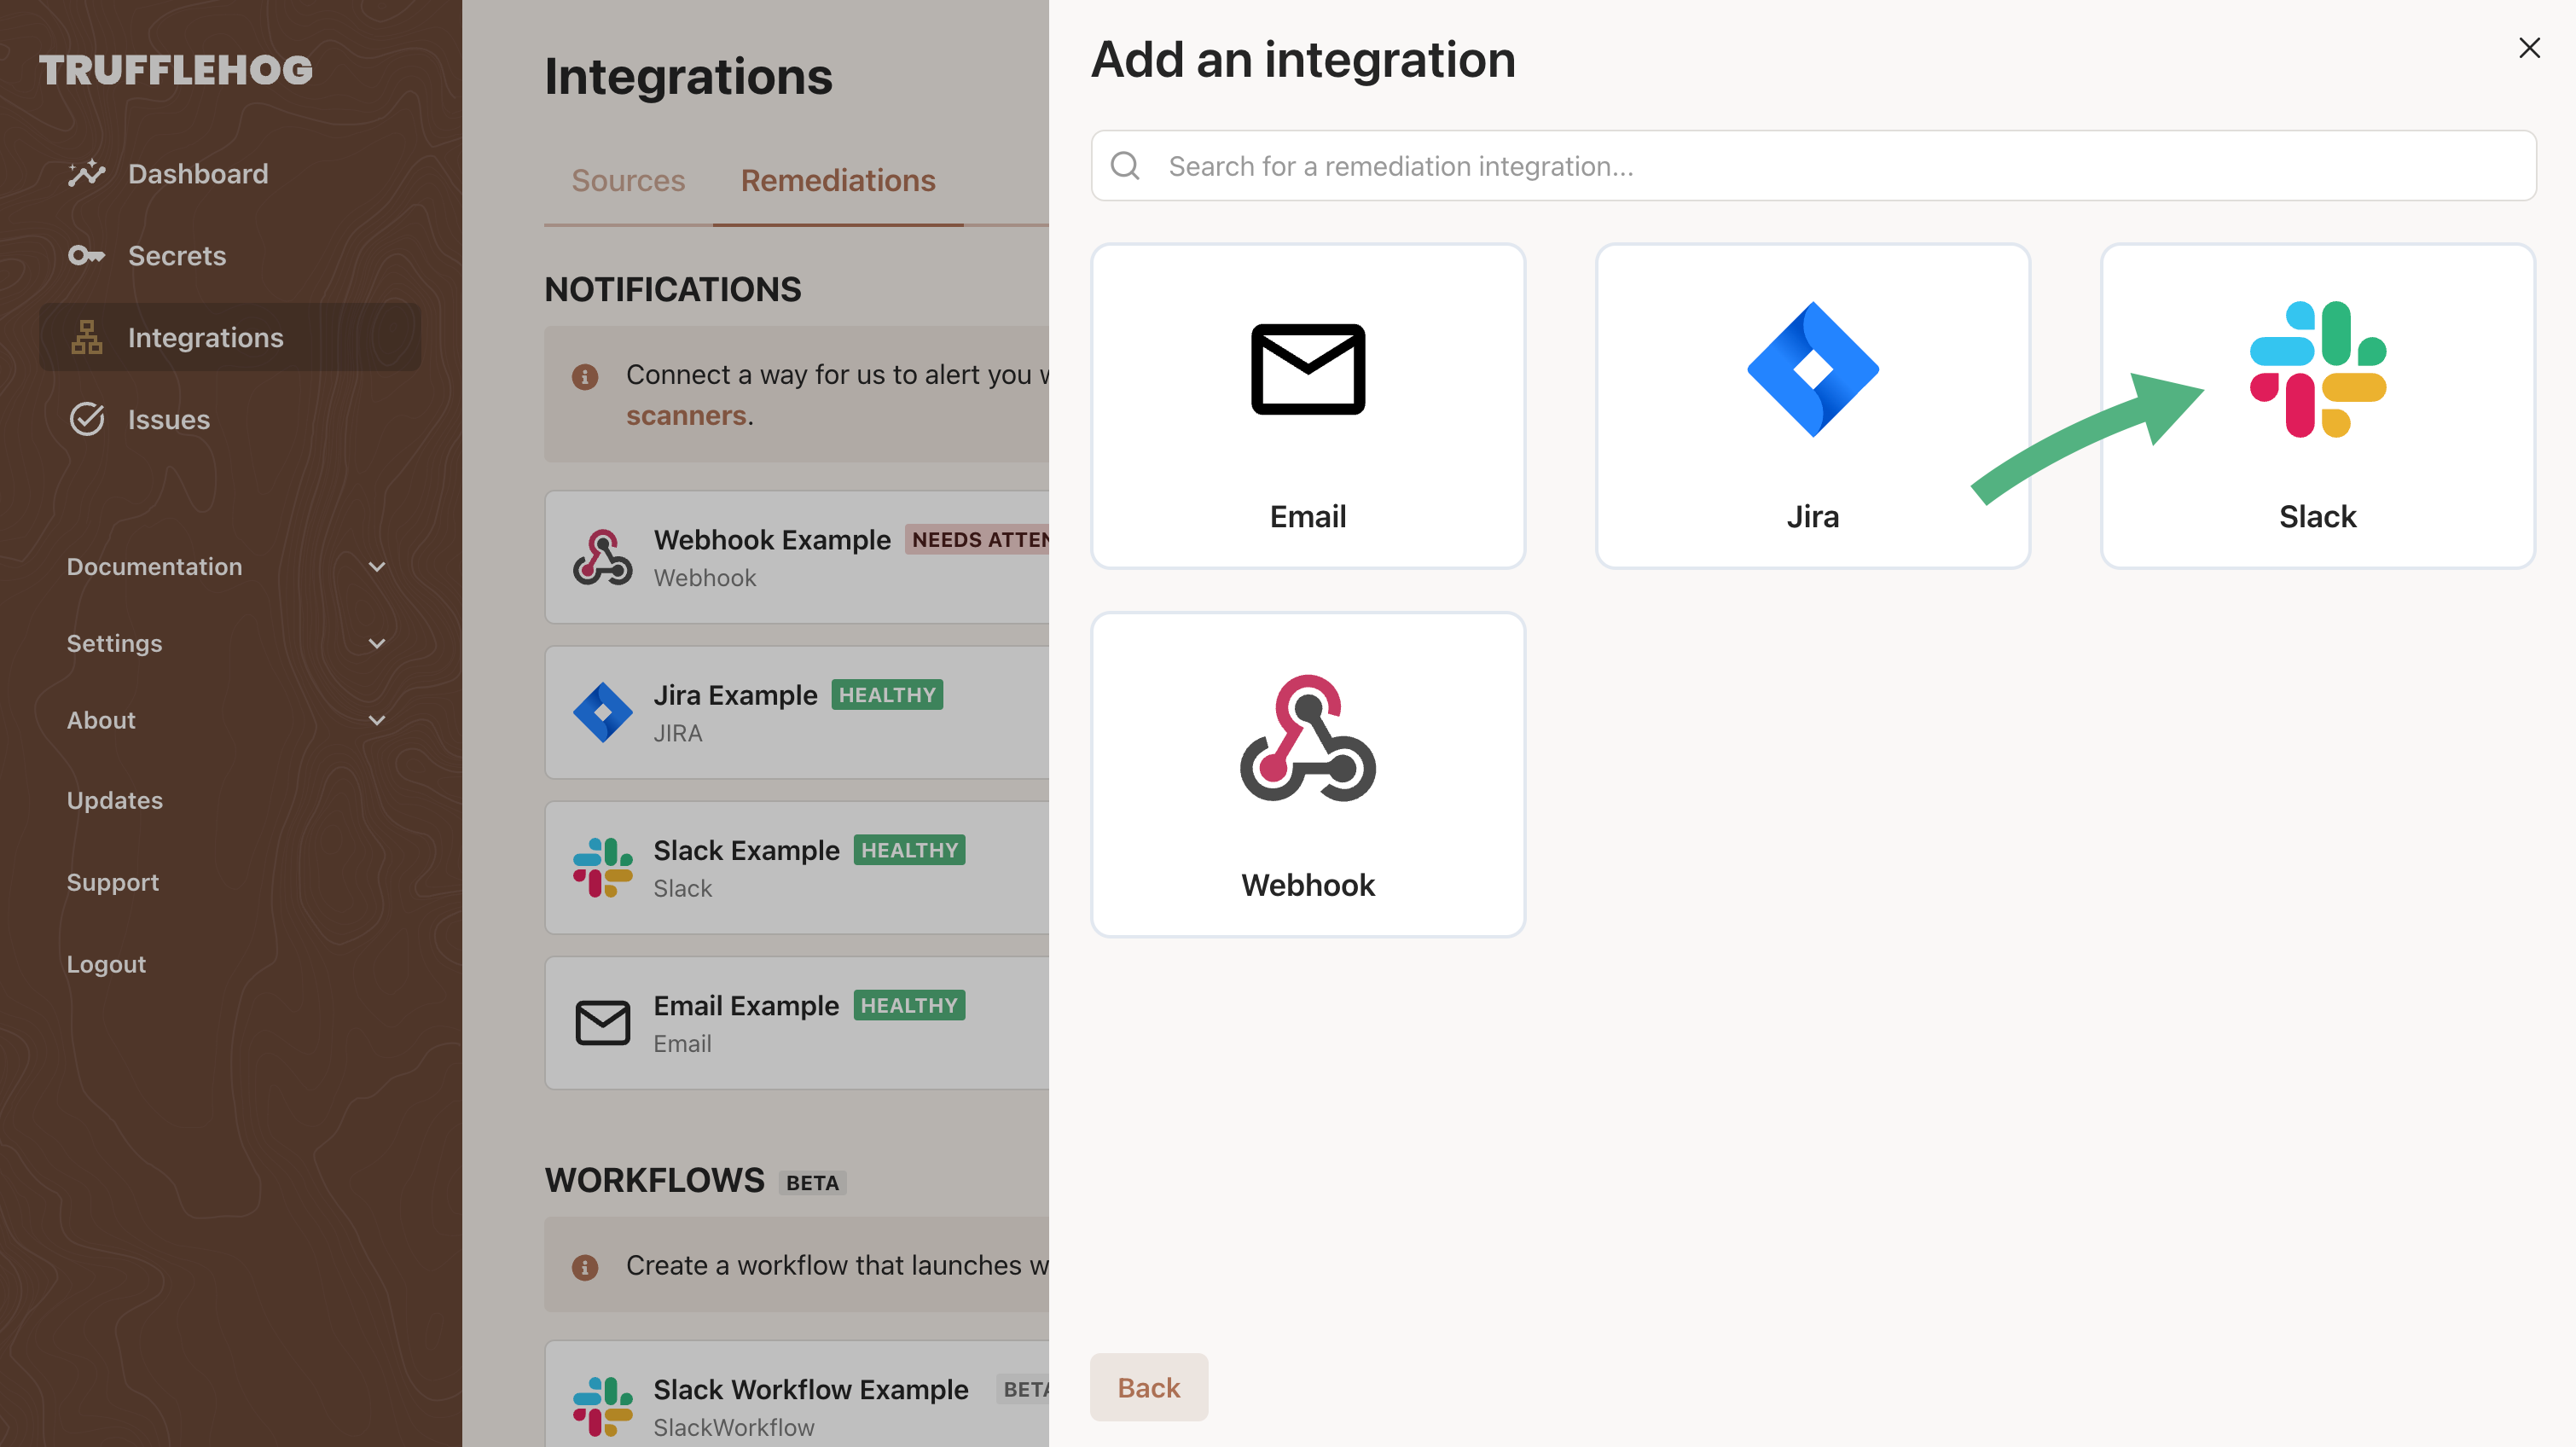
Add sources and notifiers via the web app:
Navigate to the sources tab and click add
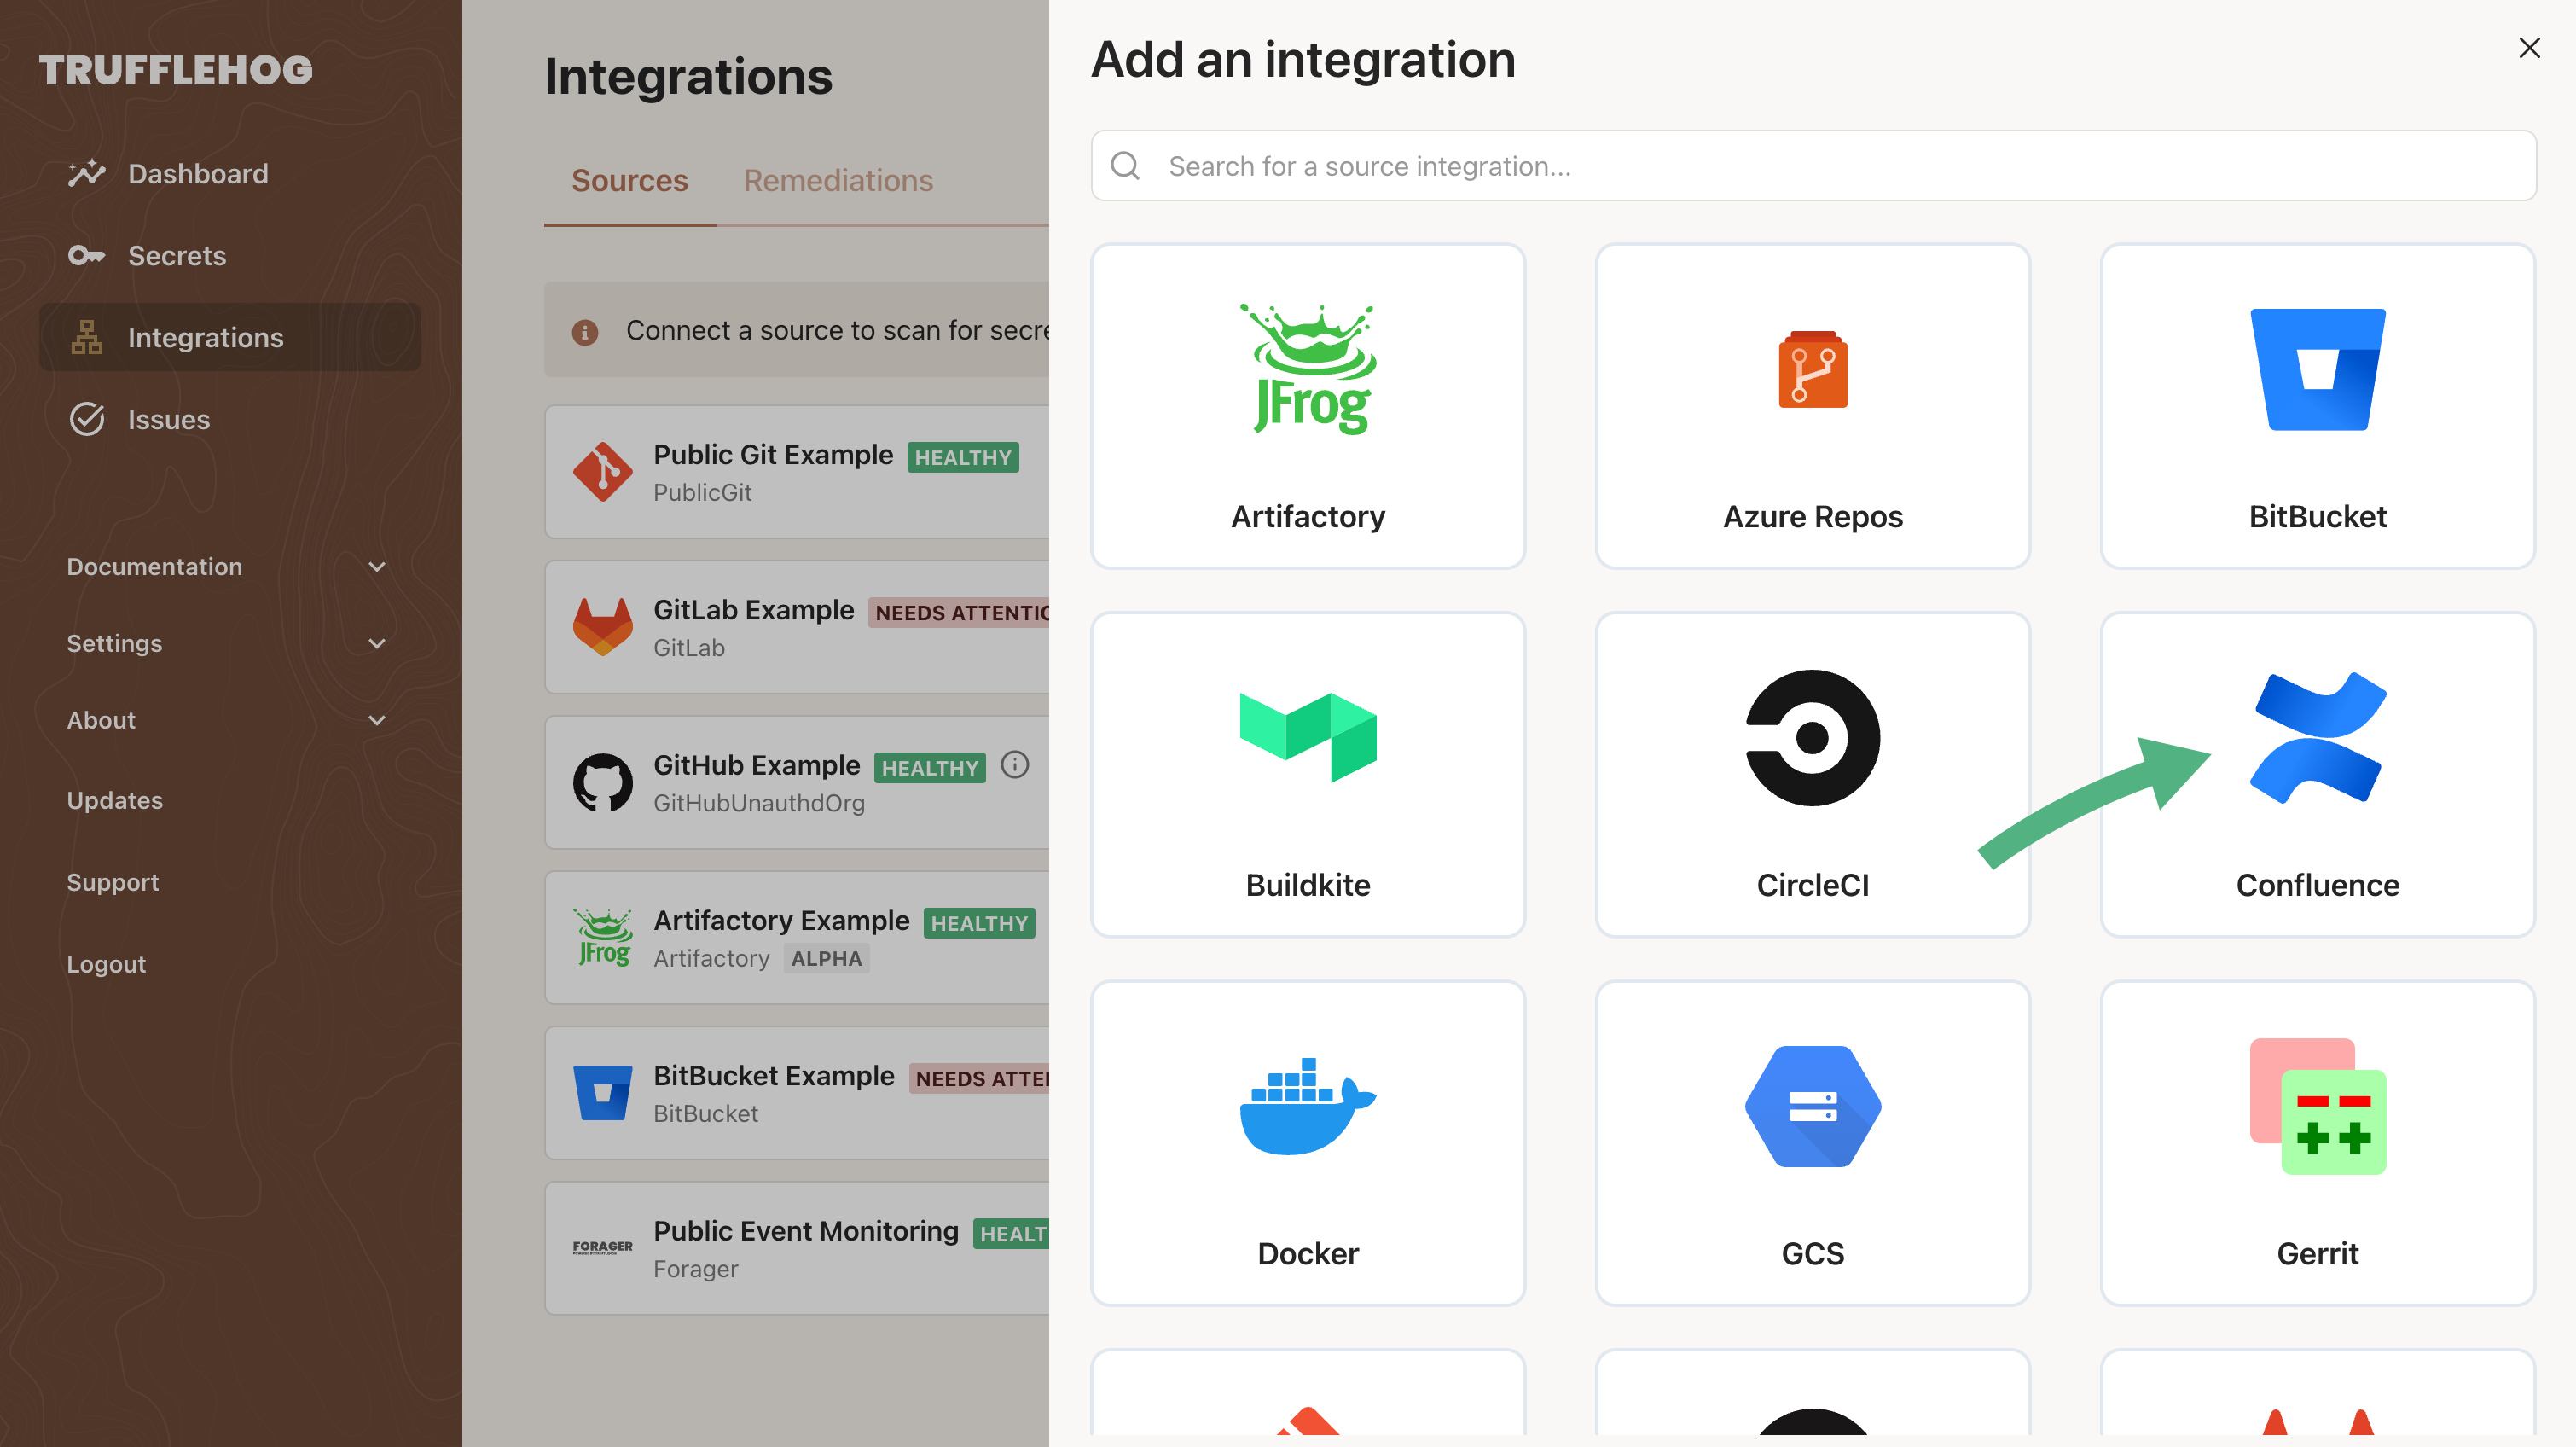
Select the source to be scanned
There are many supported sources to scan and new ones are added frequently! You can also request NEW development for currently unsupported sources on this page.
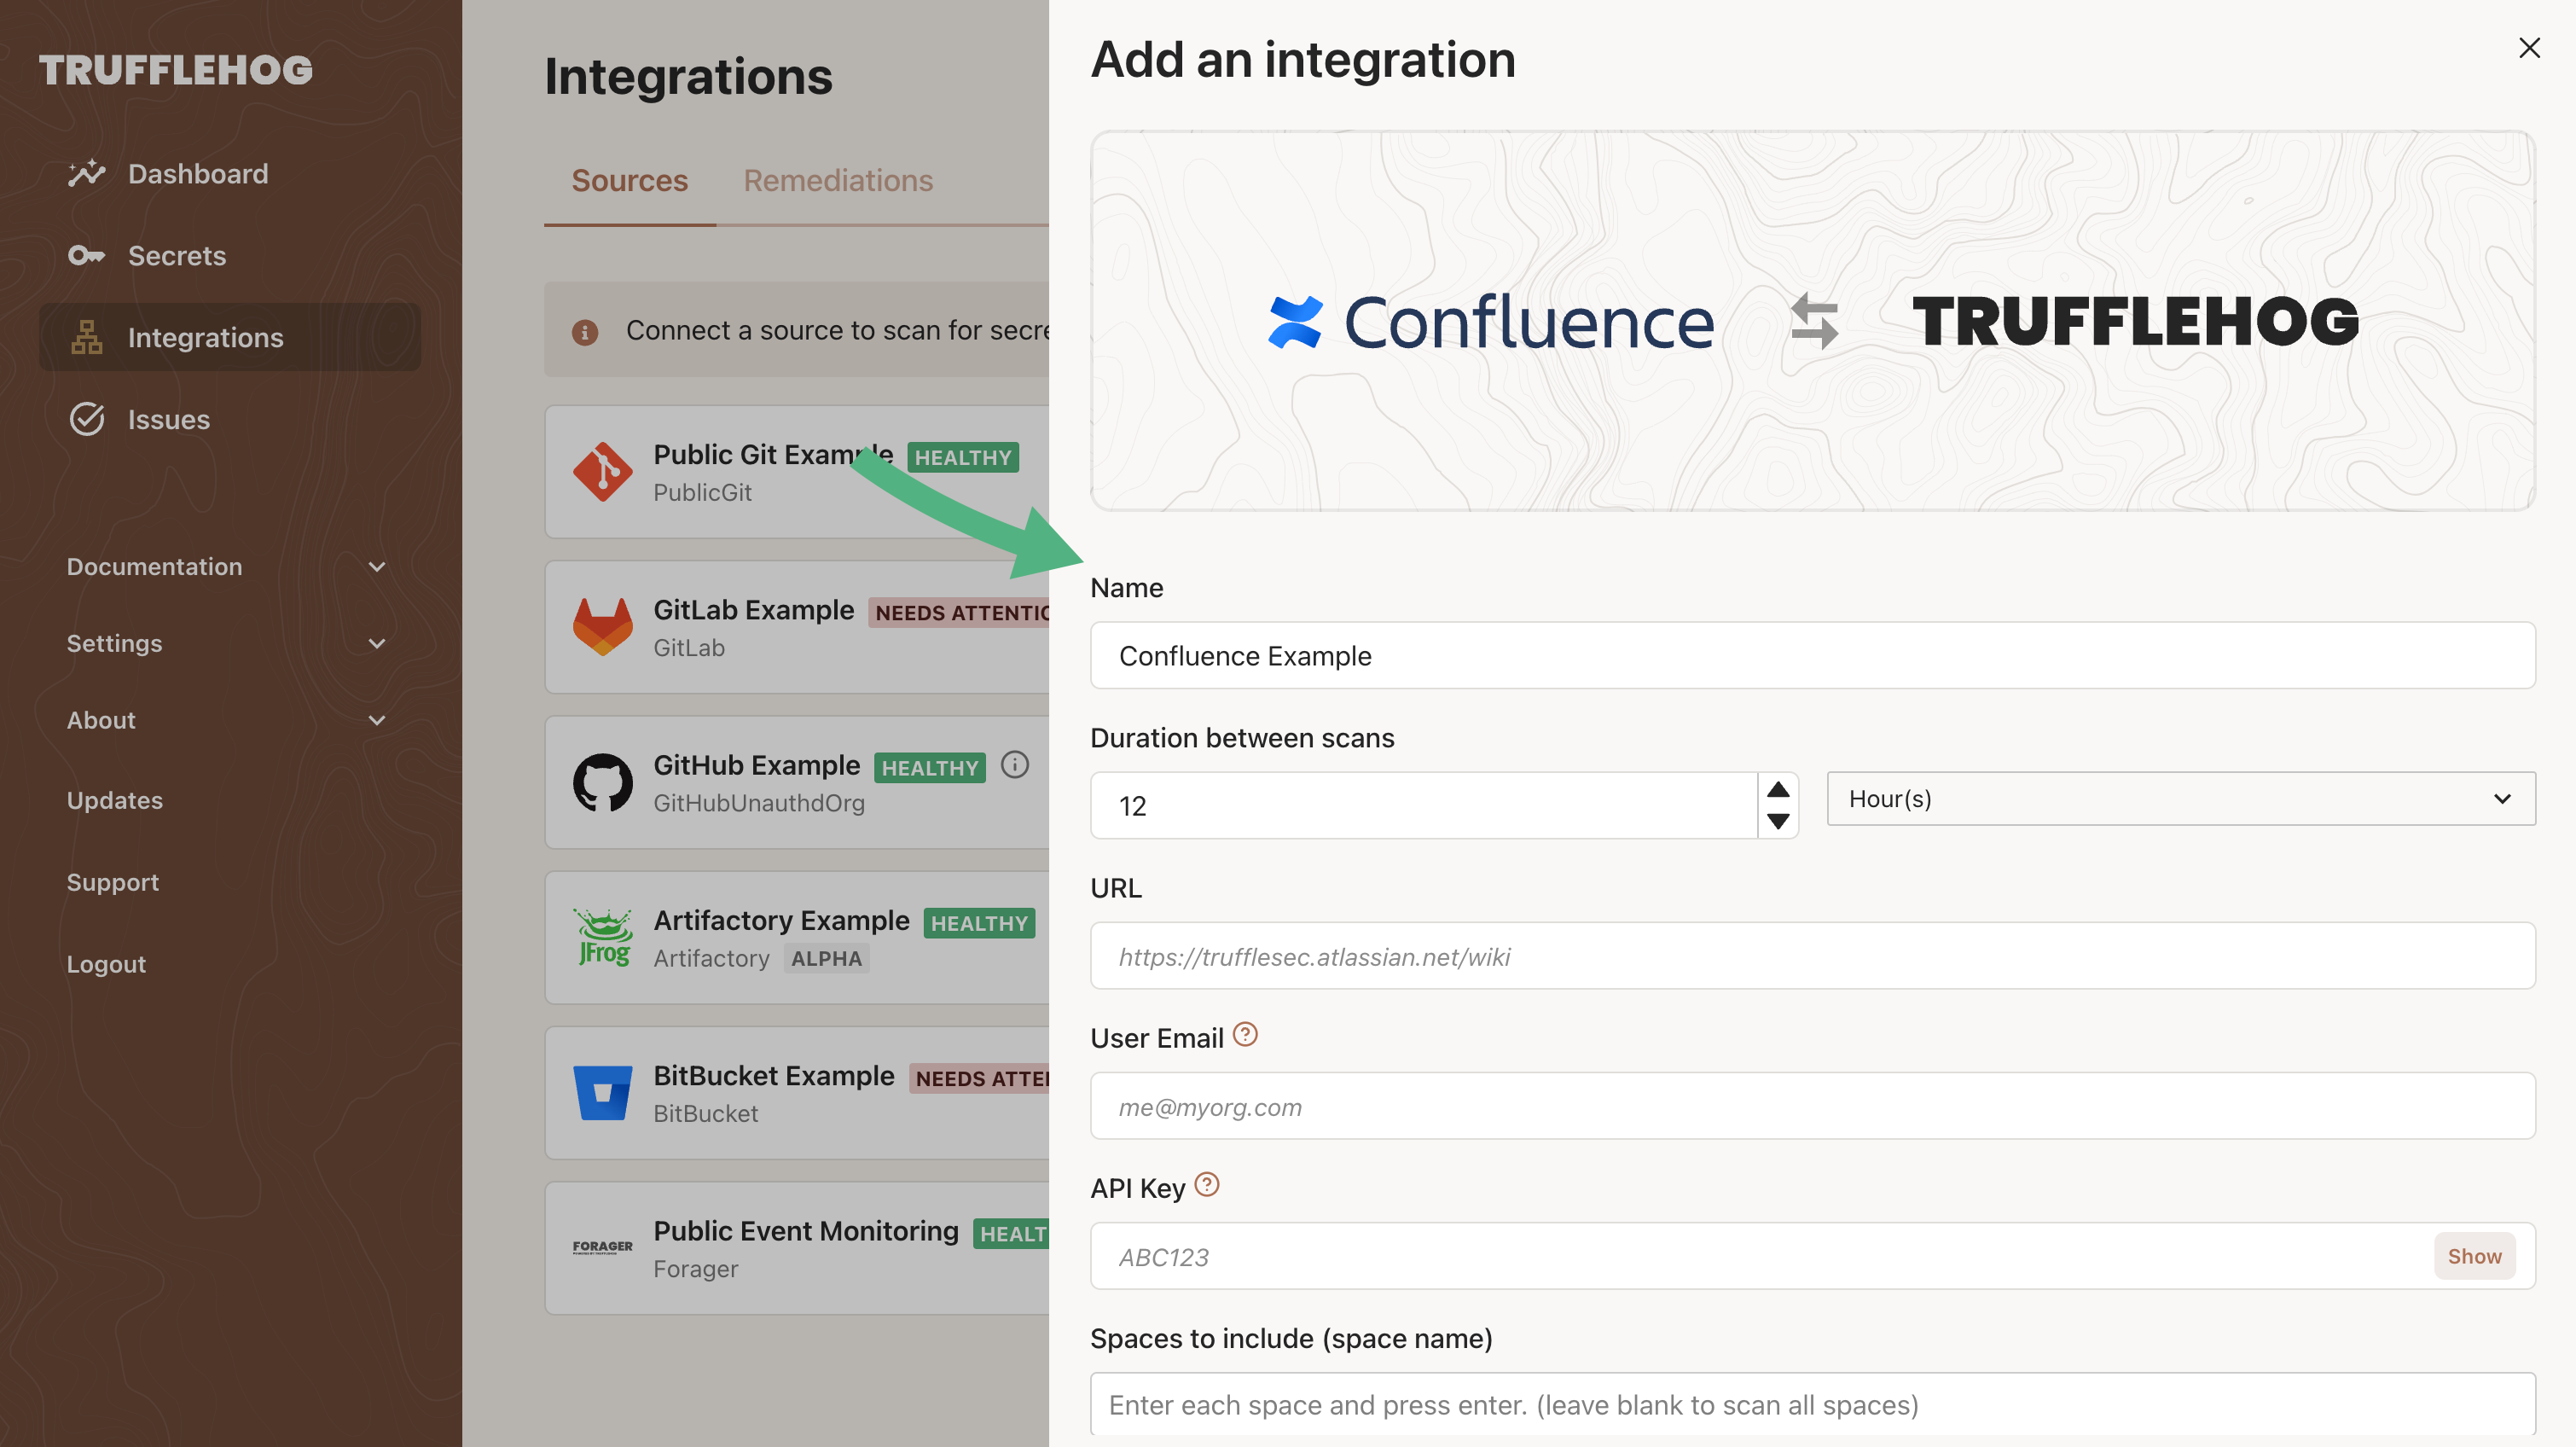
Configure how the source should be scanned
Make sure to select the appropriate Scanner for your source, and only select Verify Secrets if you own the data or are permitted to verify credentials that are found in it.
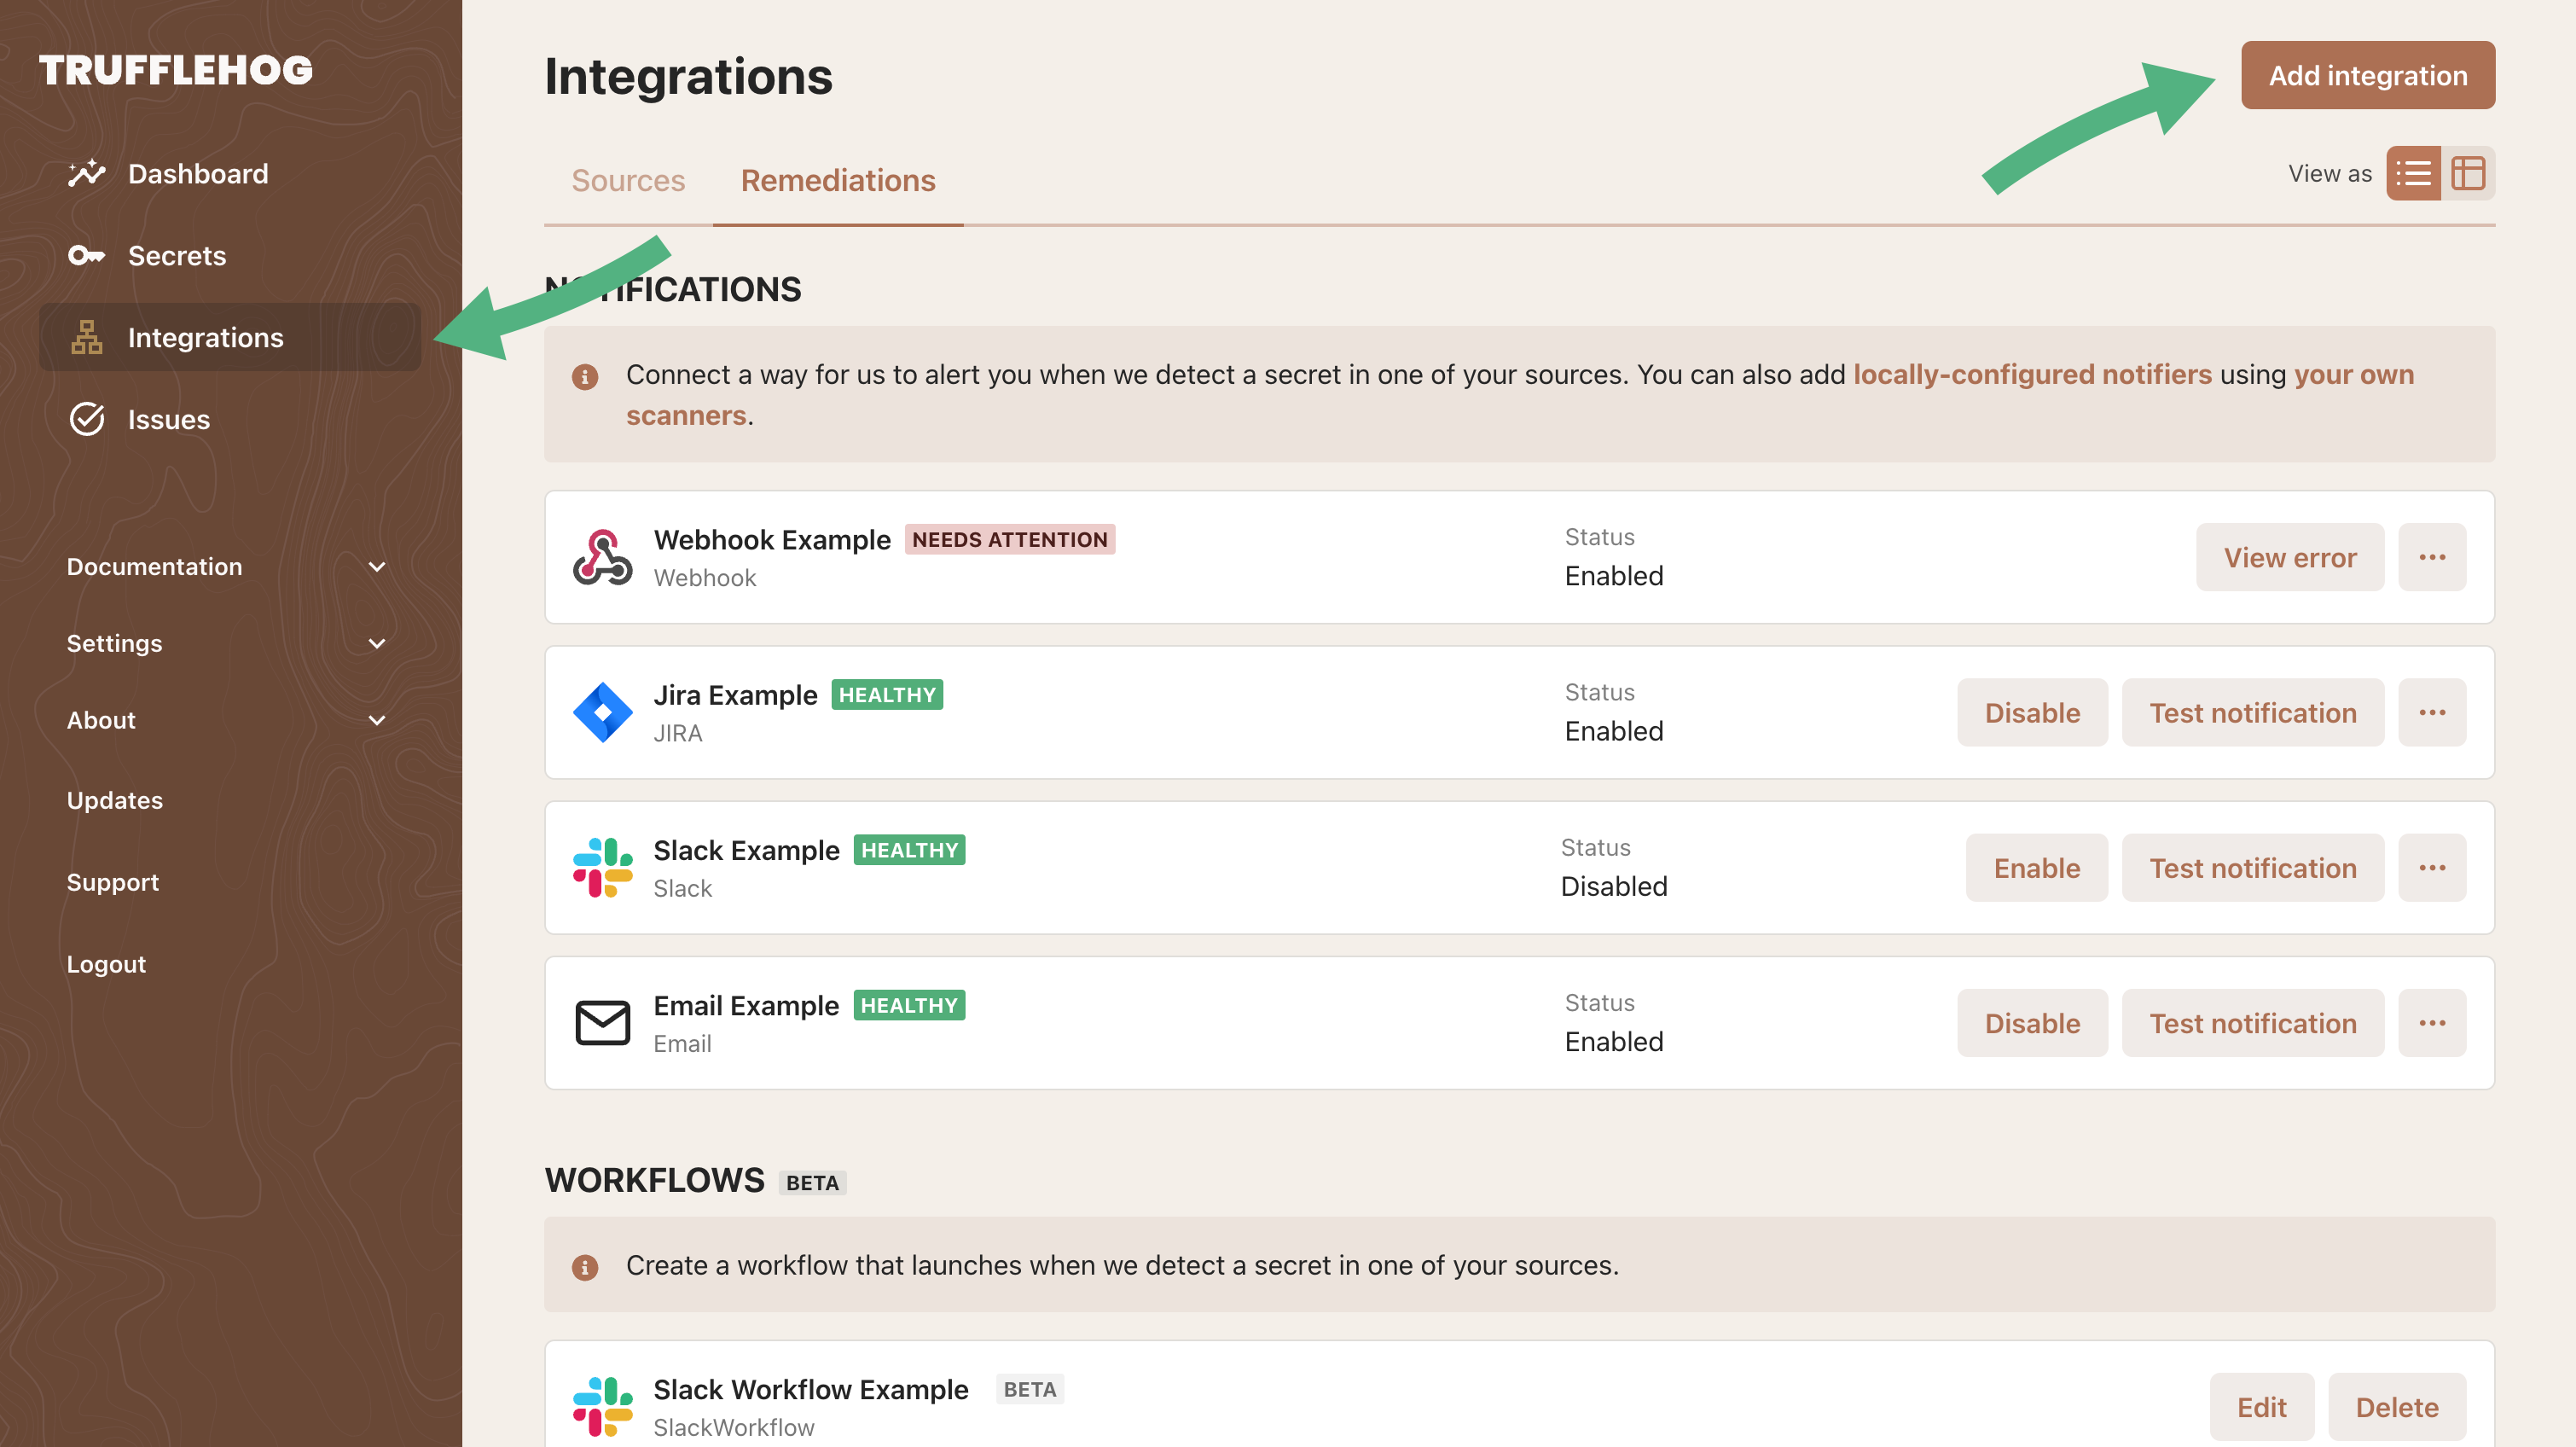
Configure notifications
You can configure notifications similarly to how sources are configured.
Run the Scanner
- If you’ve provided the configuration as a file, run the scanner with filepath provided
Note, the Windows scanner binary is named
scanner.exe.
./scanner scan --config=path/to/config.yaml
🐷🔑🐷 TruffleHog. Unearth your secrets. 🐷🔑🐷
CLI Flags
--debug, -v: Enables debug mode, increasing verbosity of logs for detailed output useful in debugging. Activates a pprof server for application profiling during execution.--json: Formats the output as JSON.--no-update: Disables automatic update checks and installations.--run-once: Executes the scan only once, making the program exit after a single scan instead of running and scanning periodically. WARNING: Using this flag will prevent notifications being sent from local scanners.--fail-verified: Returns a non-zero exit code when verified secrets are found.--archive-max-size: Sets a limit on the size of archives to scan, taking a value representing the maximum size in bytes.--archive-max-depth: Limits how deeply nested archives are inspected. Accepts a value representing the maximum depth to scan.--archive-timeout: Sets a limit on the time to spend extracting an archive. Accepts a duration value (e.g., “5m” for 5 minutes).
Note: Obtain a full list of commands and flags by running the “–help” command.
./scanner --help
- If you’ve uploaded the configuration to a secrets management solution (recommended), run the scanner with the secret provided as a URI in the format required for the tool. For example, GCP Secrets Manager is specified like this:
./scanner scan --config="gsm://my-gcp-project/secret-name"